Become a testing Avenger with SoapUI’s powerful features and versatility
7 min read
If you’re a fan of the Marvel Cinematic Universe, you’ll know that being a superhero requires the right tools. Just like Tony Stark created his Iron Man suit to become a superhero, SoapUI can help you become a superhero in the world of software testing.
SoapUI is the ultimate tool for developers who want to take control of their software testing. It provides an intuitive interface and powerful features that enable you to create and execute complex test cases with ease.
But what sets SoapUI apart from the rest of the pack? Its versatility. Like the Infinity Gauntlet, SoapUI can handle anything you throw at it. Whether you’re testing web services, REST APIs, or cloud-based applications, SoapUI has got you covered.
And if you’re worried about facing the villains of testing, fear not. SoapUI’s extensive reporting and analysis features will help you identify and eliminate bugs before they can wreak havoc on your application.
So why not become a software-testing superhero with SoapUI? With its powerful features, intuitive interface, and Marvel-worthy versatility, you’ll be able to test your applications like a superhero. Don’t just be a developer, be a SoapUI superhero!
Ready to become a software testing superhero with SoapUI?
Step-by-step guide on how to use SoapUI with Unit4 ERP in order to test and create Suppliers
Step 1
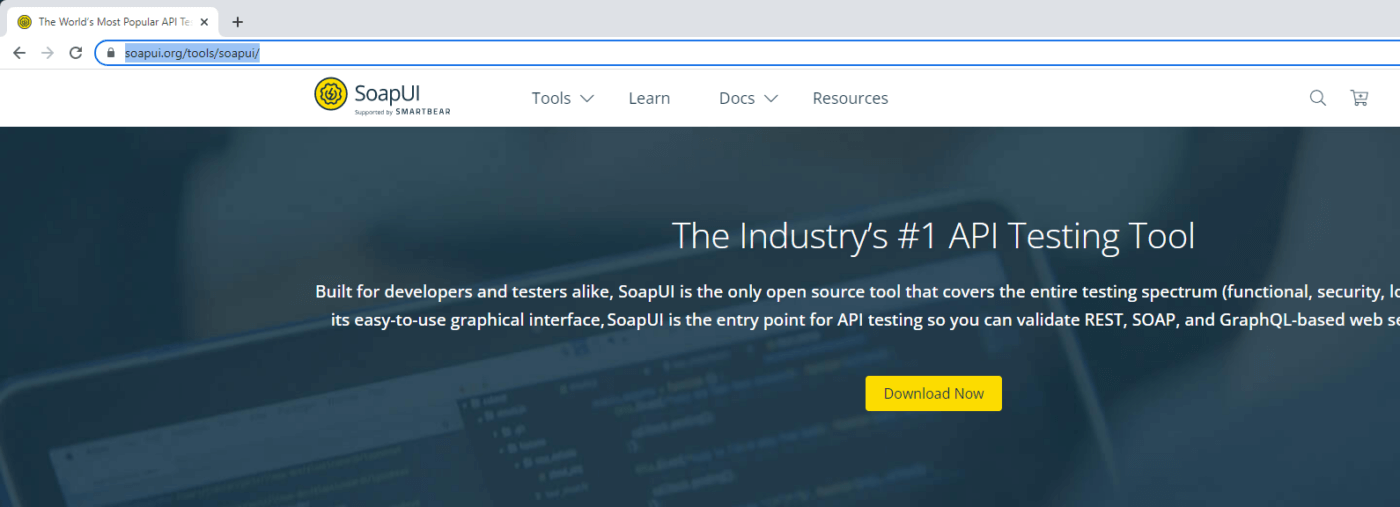
First, we need to install SoapUI. You can download the latest version of SoapUI from the official website https://www.soapui.org/tools/soapui/
Step 2
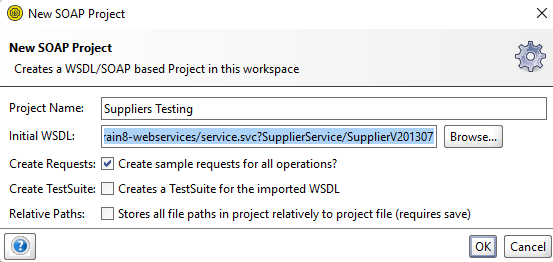
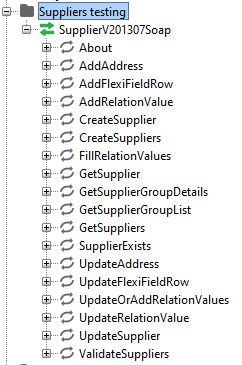
Next, we need to import the WSDL for the Unit4 ERP API into SoapUI. To do this, go to the File menu and select New SOAP Project. Enter a name for your project and enter the URL for the Unit4 ERP WSDL file, tick the Create Requests checkbox and click OK. This will import the WSDL into SoapUI and create sample requests for all available operations.
Step 3
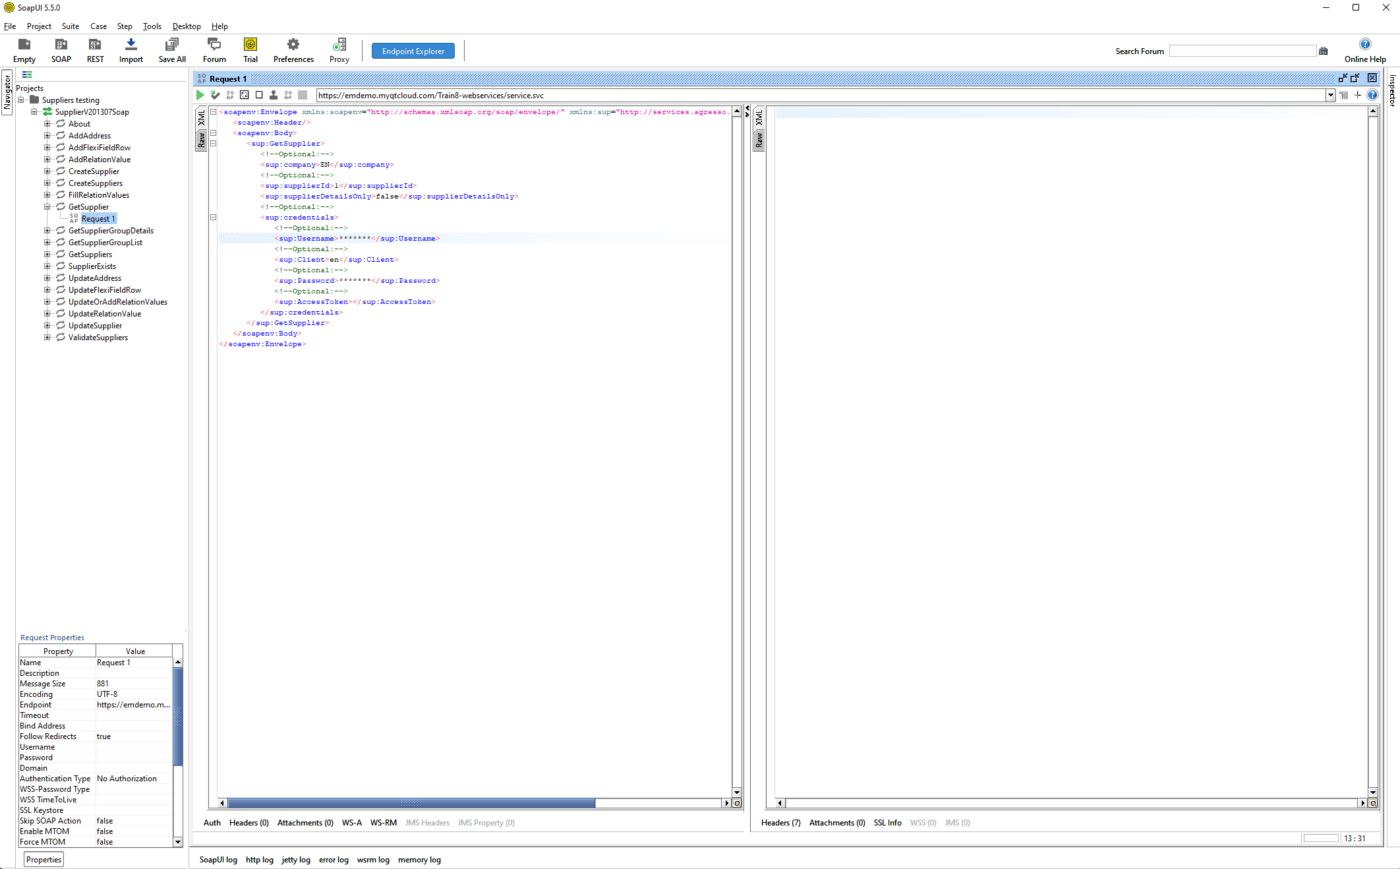
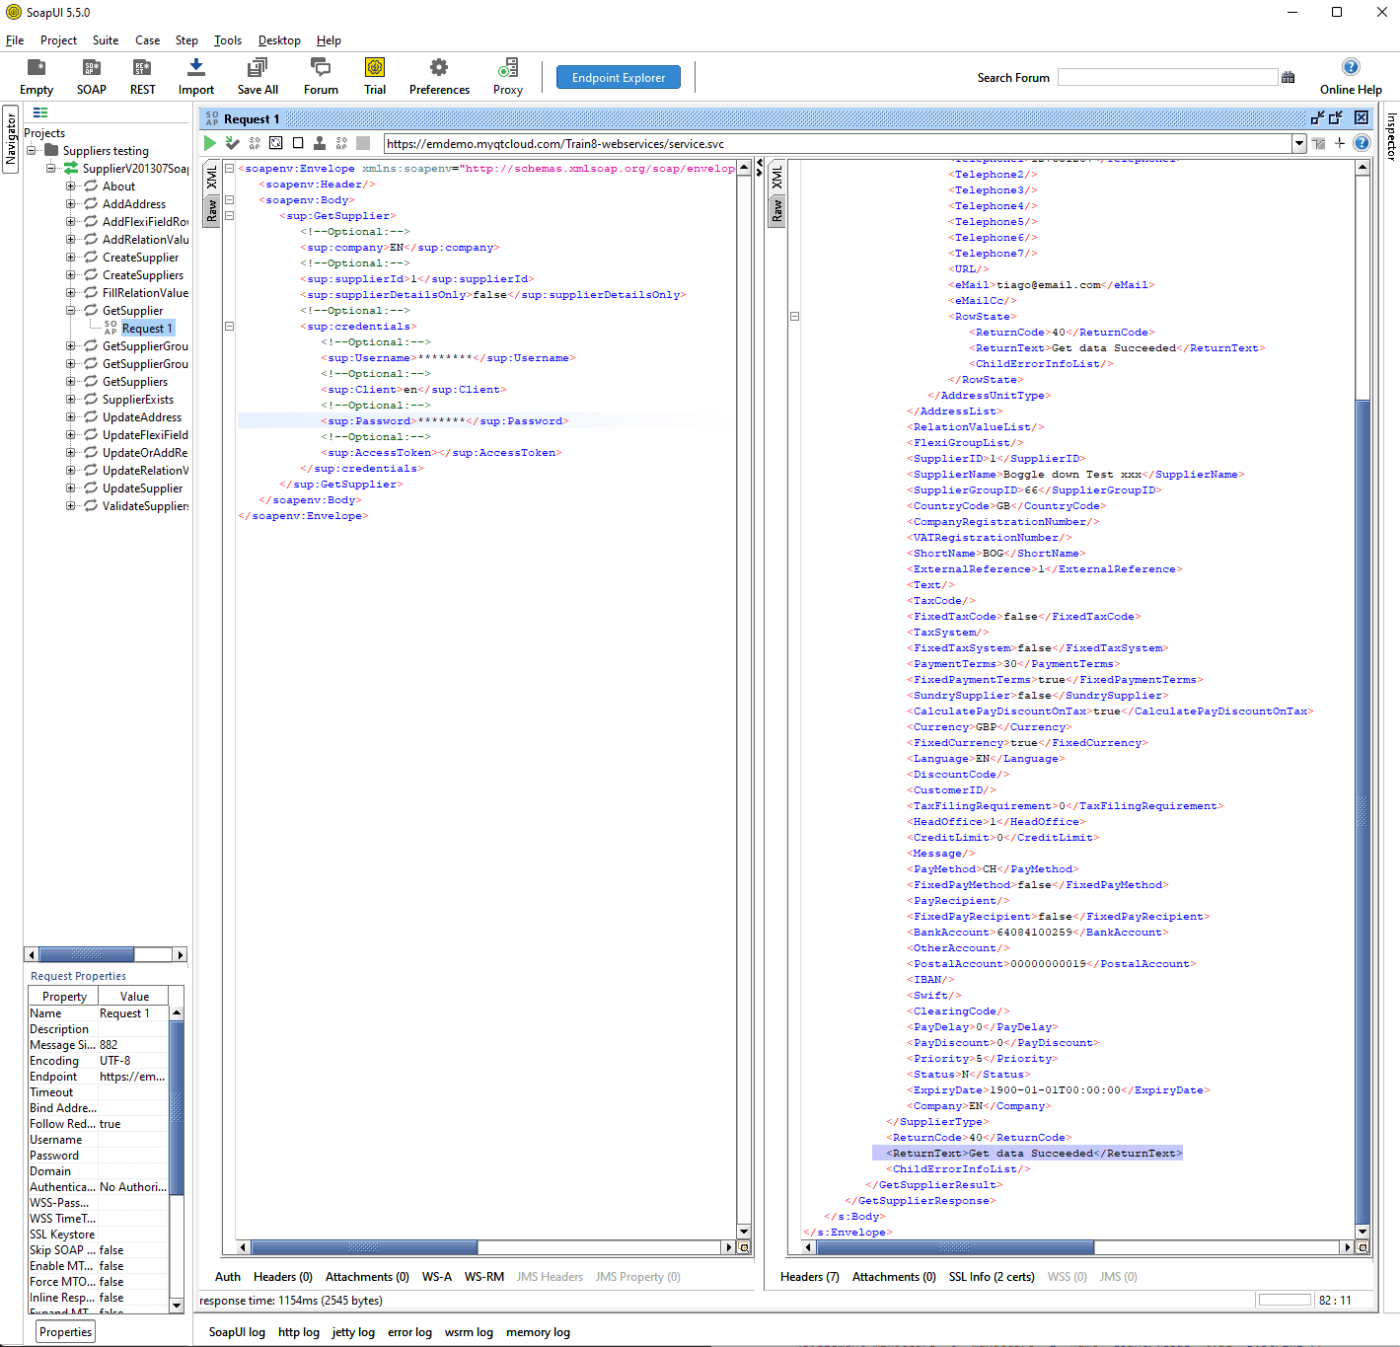
Once the WSDL is imported, we can start using the created requests cases. We are going to start with the GetSupplier one to get a sample of the structure that we can then use to create a new one.
Step 4
Once you’ve added your values like Username, Client, Password and which supplier you want to retrieve, you can run the test case by clicking on the green play button in the top toolbar. This will execute the API request and check the response against your assertions. If the test case passes, you can save it and move on to the next test case. If it fails, you can review the results and make any necessary changes to your API request or assertions. You can see below our Get data Succeeded.
Step 5
Now that we have the Syntax for a full Supplier record in the Right window, we can use that to go in and create a new Supplier. If we get an error when trying to create the new Supplier, we can then compare against the above syntax and try to troubleshoot the issue. In the CreateSupplier request we have a Request 1 test case, after adding all the necessary fields we can run the test case by clicking on the green play button in the top toolbar.
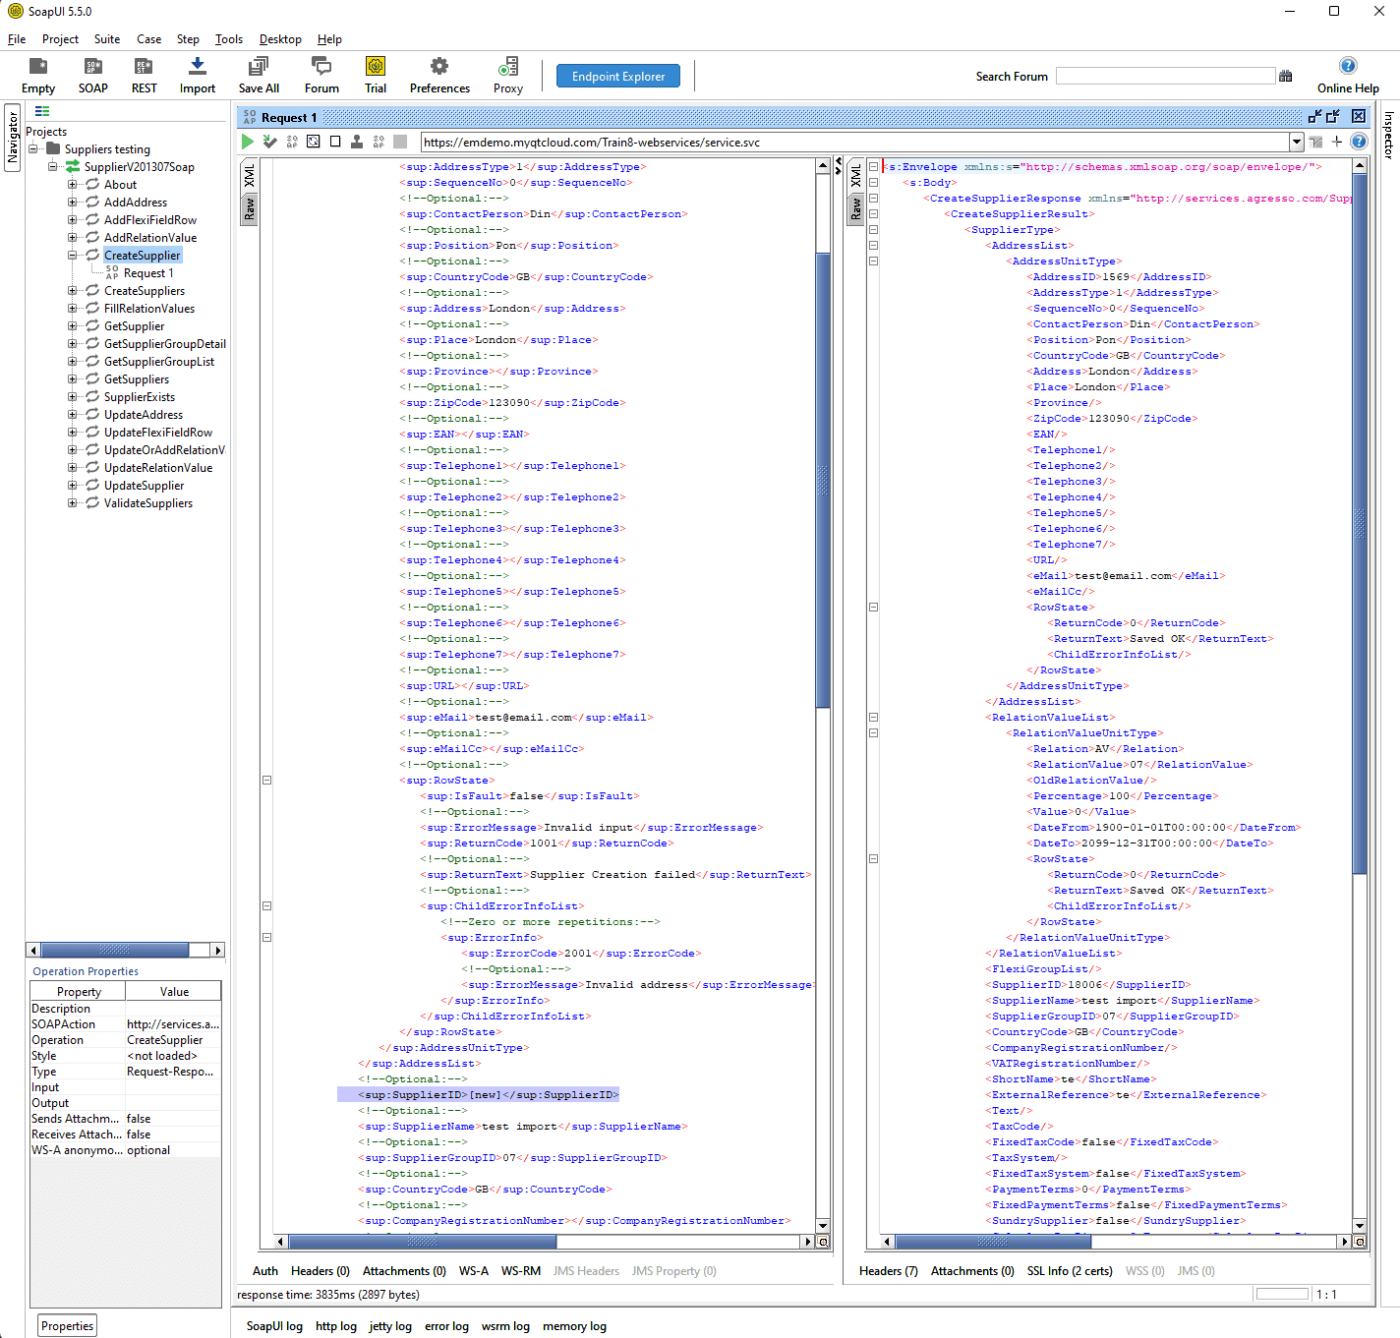
For the above example we have left the Supplier ID with the value of “[new]” as we want the Unit4 ERP auto numbering for Supplier to allocate a new Supplier ID. We get a successful saved OK message and a new supplier Id allocated of 18006.
By following these steps, you can use SoapUI to test the Unit4 ERP API like a software testing superhero. SoapUI’s powerful features and Marvel-worthy versatility make it the ultimate tool for any developer looking to take control of their software testing.
If you’d like to learn more about how to integrate, test or get the best out of your Unit4 ERP, get in touch with our experts. We also run a variety of Unit4 focussed training courses, with new topics and dates being added all the time. You can find out more on our training page.
